Monday 31 March 2014

to do to do to do........boxed cards

i hope everyone had a lovely mothers day,

two cards today along the same lines just slightly different styles,

On Saturday while is was getting ready for the craft fair packaging, pricing etc i got distracted and starting  playing again with the air dry clay as you do, my husband thought this highly amusing as he knows i would rather be crafting then doing boring stuff like being organised, we have all been there!!!
so i made a few more embellishments for cards, but in paler colours using my air dry clay.
then after a few hours of playing, i decided  i had to sort out one of the craft draws as it was a bit of a mess, again as i was doing that and i got distracted yet again,
i had found some acetate domes which then got my mind off tiding the draw and on to crafting again.
i hadn't used these for years so i was sitting there deciding now what to do with them.
the husband by this time had given up on the idea that i was tidying my room out and just went off and watched football.


I then thought  wow i know i havent made a boxed card for years ill do a few for the craft fair.

so off i went in to the crafty world i live in and started playing

and these are what i come up with. 

 loved the colours on this, very springtime and a great Easter card ,
 as you can see i have used the dome to protect my air dry clay embellishments
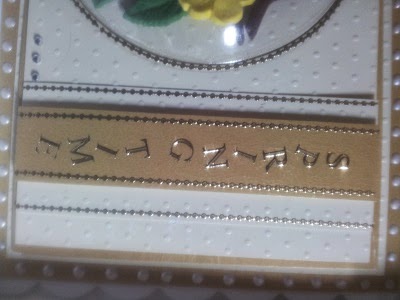
you dont always have to put a happy birthday or a best wishes sentiment on a card some times just a simple word makes the card.


 this is the box i made for the pale yellow card


 again using my air dry clay i have made a rather exotic bird using brown and red marbled together rather then fully mixing them
 not sure whether your seeing the true colour on these photos but this was a pale blue and black card
with these embellishments i glazed them after they had dried then sprinkle a bit of glitter over them, in all my flowers i have added a diamond gem to the centre as it wouldnt be a card without a bit of bling
 as this picture shows its the box to match the card.
same colours

if anyone would like to know the contents of what i have used please ask, and i will gladly tell you, if you would like to know about how to make the boxes again ask and i will tell you. they are so easy to make i think both boxes took me less then ten minutes to make up in total. and all you need for each box is 2 a4 pieces of card.

hope you like the cards and that i have inspired you to try them out . Im glad i came across my domes as i think they not only make the card a bit more dimensional but add a touch of class too, and yes i even used my spellbinders again  woop woop!!!

please feel free to leave a comment i would love to hear what you think, and any question please feel free to ask.

thanks again see you soon
ttfn xxx
all cards are for sale at the shop
althrough the new cards inc these wont go on till after the 12th april after the craft fair so if you do see something you like then please contact me through the blog
these boxed cards are £9.99 each.


Friday 28 March 2014

Tattered lace dies, Would you recommend them?

Good morning all, 

Now you know i like my dies and i was sceptical about the tattered lace dies, having used spellbinders for so long you get used to one thing.

well I decided to purchase just one tattered lace die, to see if i liked it. The one i brought was on offer in a well known hobby shop and its the one shown below the with love always sentiment.

After buying it i was looking at it and i do notice straight away you cant colour through the die but having said that you can always colour once die is cut. so no big hassle there.

i found tit very easy to remove from the card, in fact it just fell out, which considering how intricate the die is, was a surprise.
so all in all so far so good, 


This card i designed was made using spellbinder dies as well, as i have said i only have one tattered lace die (which might change now)

I started off with a blank card, and picked red as my main colour and a buttermilk dotted embossed card,
i made some faux pearls around the outside edge using my cosmic shimmer glue, i cut a black lattice spellbinder die from black card and placed that over my buttermilk card.
then cut out one tattered lace die out of my red card stock which was co-ordinations and then took my heart from the spellbinders delights and cut two out, one on red card and the other on white card i also cut out two mats again in  coordinating colours

i placed my design on the card were i wanted everything to go using the dry run then mat and layered my card applying glue and foam pads for dimension on the back of the hearts

TOP TIP !!!   to mat the tattered lace die on to solid card i place a blob of glue on the back of my hand and wipe over a piece of card stock to level it out. i then take my design and place it on the back of my hand covering the whole die shape with glue then stuck it down,
i find gluing intricate dies this way covers the whole design and also covers evenly so no squelches come out on your card when you place it down it also dies quicker.

all in all i am happy with the new die and the design i made. I do think more Tattered lace dies will be purchased in the future.


Another card using the tattered lace die


again same principal as before with faux pearls mat and layering I've just added a nice bow down the side of this card 

i would love to know if you use tattered lace dies and what you think of them, please use the comment box below. i would also like to know what tattered lace die you would recommend and why. or just tell me your fav one. if you have any cards you have made using these dies then send me them i will then put them on the blog.
always lovely to see other designs

well thats it for now please get in touch
till next time
ttfn xxx


Wednesday 26 March 2014

Air dry clay by Martha Stewart.

good morning peeps,

first of all the craft fair i mentioned is now confirmed.

Food Craft and Collectors fair
Saturday 12th april 2014
10.00am till 4.00pm 

The United Reformed Church, 
Nairn, 
Highlands,

so if you live near there pop in......

i have have been playing again with the Martha Stewart air dry clay,

i have decided its a strange type of clay, feels like marshmallow when you get it out of packet, gets quite sticky when you leave it on damp cloth while you work with it (which is recommended) and if you work it to much it goes very fibrous almost paper like,  it doesn't really dry like clay, it dries like a foam, but a slightly harder foam.
its easy to mix and make new colours, you also get a colour chart in the box.
i also liked the marbling effect you get when your not quiet mixing the colours together,
but i must say the colours even through you only get about 4ozs of the brown,red,blue and yellow, you do only need a tiny bit to mix with the white or other colours as i think there is a high colour pigment in it. so it will last a while if doing smaller projects with it.
i store mine in a tub with a damp cloth in it which so far the clay is still ok and i opened it Wednesday last week so not bad going.

I don't know whether any of you have tried it but if you have let me know what you think.


anyway i do like it and i have made a few embellishments with it, i also tried it out on my spellbinder dies, not by rolling it through the machine but just making an impression on the die. i would not recommend this as it does get a bit stuck on more detailed dies, but its easy cleaned.... so that would be up to you if you try it.
i have also pressed it on pennies and 2p's which make nice embellishments the possibility's are endless on what you can do with it.

 i did a butterfly die which i was fairly happy with,

anyway this card was really simple to do and fairly quick if you take away the drying time for the clay. I suggest you make a load of embellishments one day and let them dry over night ,


 This is the card i made from the clay, i made the bird
flowers and leaves,
as you can see i marbled the clay to create the two tone effect on the flower, the bird is two tone too but i don't think you can see that very well

 i took a 8x8 blank card and cut our black piece of card to fit, i did faux pearls around the edge, i then cut out two flourish's using my spellbinders and a tag for a sentiment.
i picked a pale blue card to do my design on, i always do a dry run first to make sure im happy with were i want the design to go.
i then glued the design down using pinflair silicone glue  i added a few gems to my sentiment and to the centre of the flowers,

i feel this card has a slight oriental feel


these are a few embellishments i made, the butterfly is the one i impressed on to my spellbinder die.

the others are using the Martha Stewart molds you get in the pack

remember pop over to
my shop

to see cards i have for sale.
any cards featured here will be up for sale
after the craft fair if it doesn't sell or you can contact me via here or the shop if you wish to purchase before hand.

anyway have a good day folks and see you soon, please feel free to comment or ask questions
im always happy to assist if i  can .

ttfn
xxx

Saturday 22 March 2014

Male card

This card is moving away from spell binders, I have been playing with martha stewarts air dry clay,and so far im liking it, the only cons to it I have found is the box really doesnt come with any instructions on how long it keeps and how to keep it once opened. But in searching the tinernet I come across the how too's ....
The set I brought was the nature starter kit , I paid 22.50 and in the box was 4 molds, 5 clays, 1 white,1 blue ,1 yellow ,1 brown and one red , 2 tools, some florist wire and florist tape.

To start
I took my clay and made the leaves bird and stem. you can find these tutorials on you tube, set a side and let them dry for 24hrs.
Then I took some green and brown card which was from co ordinations, matted and layered them.
I pin pricked my first brown mat, I then used cosmic shimmer faux pearl glue and did spots on the green mat,  the pearls was made with the dark bronze one colour,
I then placed my bird, leaves and stem on to some delicate green patterned paper arranged them and, stuck them down using pinflair silicone glue. To finish I added a happy birthday sentiment.
Im fairly happy with the result.i do struggle to make make cards but I think this set will come in useful for them. What do you think? Any,questions feel free to ask...

Wednesday 19 March 2014

Im Back!!!!

well hello everyone,what a year i have had.

since i see you all last i stopped making cards, and selling them. and i also stopped my blog.

if you had been reading my blogs i had to have an op, it was for a ruptured disc in my neck. i had been suffering from a trapped nerve for 3 yrs prior to this and they finally operated on me.
after the op i couldn't do anything. and i mean anything how boring live was ,i wasn't aloud to hoover. pick up things. wash up. load the washing machine. nothing!!!
they even said a kettle was to heavy for me to lift!!!! what no coffee....... omg!!

so for 6 weeks i was laid up not being allowed to do anything. then the physio started ,

moving onto today....

has the op made a difference...only to were the pain is now
i suffer a lot of headaches and pain in the right side of my neck now,
the doc says that quiet normal for up to a year.....wow still 5 months to go...

anyway i decided i cant sit around doing nothing all day any more so with my support chair im getting back in to card making/crafting.

now i wont be posting everyday because that wont be good for me and i don't want to disappoint anyone who will except that but i will try and do at least one card a week,

im also doing my first ever craft fair in April  which im really looking forward to.
when i have finalised the details i will post it here. all i can tell you at the moment is it will be in Nairn just outside inverness in Scotland. i need to confirm the date but i think of the top of my head its the 12th April. so hopefully i may see you there?

also i will be getting the website for purchase any of my cards back up and running within the next week or so so look out for that.

i will post all updates on here so stay tuned.

that's it for now folks its great to be back, looking forward to sharing my creations once again with you all

take card and
ttfn x